How the Glute Bridge will Improve your Glute Strength
The glute bridge is a simple no-equipment exercise that strengthens your posterior chain. Unlike many activities, the glute bridge is simple to learn, and you can even do it at home.
One of the most notable benefits of the glute bridge is that the exercise strengthens your posterior chain: glutes, hamstrings, and lower back. The movement is also beneficial because you can adjust the difficulty to fit your athletic level, and there are numerous fun variations to try.
Aside from making you more athletic, the glute bridge promotes whole-body stability and proper spinal alignment. As a result, your posture improves, and you’re at a lower risk of injuries. Plus, everyday tasks like picking things off the floor and walking up flights of stairs get easier.
We recommend including glute bridges near the end of your training and doing high-repetition sets with a steady tempo. You can do the movement as little as once per week or up to three times to develop your glutes more quickly.
How to do a Glute Bridge

- Lie on the floor with your arms straight and to your sides. Place your palms flat on the floor.
- Bend your knees and plant your feet firmly on the floor.
- With your head, shoulders, and butt in contact with the floor, take a breath.
- Push through your heels, contract your glutes, and shoot your hips toward the ceiling until your knees, hips, and shoulders are in line.
- Hold the top position for a moment and exhale.
- Lower yourself to the starting position and repeat.
What muscles does the glute bridge activate?
The primary muscle group that works during glute bridges is the gluteal complex, which consists of the glute maximus, minimus, and medius (1, 2). Together, these muscles produce hip extension, which occurs off the bottom during a glute bridge.
Our hamstrings are also involved in glute bridges because one of their functions is assisting the glutes with hip extension (1, 3). The muscle group also provides stability at the knee, making it easy to keep our balance during a glute bridge.
The quadriceps are the third muscle with an active role during a glute bridge. The muscle group covers the front side of our thighs and produces knee extension, which occurs as we drive our hips to the ceiling (4).
Another muscle group that works during glute bridges is the erector spinae, which runs along both sides of the spine. These muscles flex isometrically and keep the spine in a strong and healthy position as we do the exercise. Similarly, the rectus abdominis, transverse abdominis, and obliques contract to provide torso support.
Tips on Proper Form when Preforming a Glute Bridge
An essential tip for the glute bridge is ensuring that your knees are slightly behind your heels at the top position. Doing so places you in a stronger position and allows for proper glute activation (1). Having your feet too close to your glutes puts unnecessary stress on your lower back.
Another essential tip for glute bridges is engaging your core from the start. As you lie on the exercise mat, keep your lower back in contact with the floor. That way, you can engage your abs and promote a healthy spine position. Similarly, you should avoid raising your hips too high because that will lead to hyperextension and lower back stress.
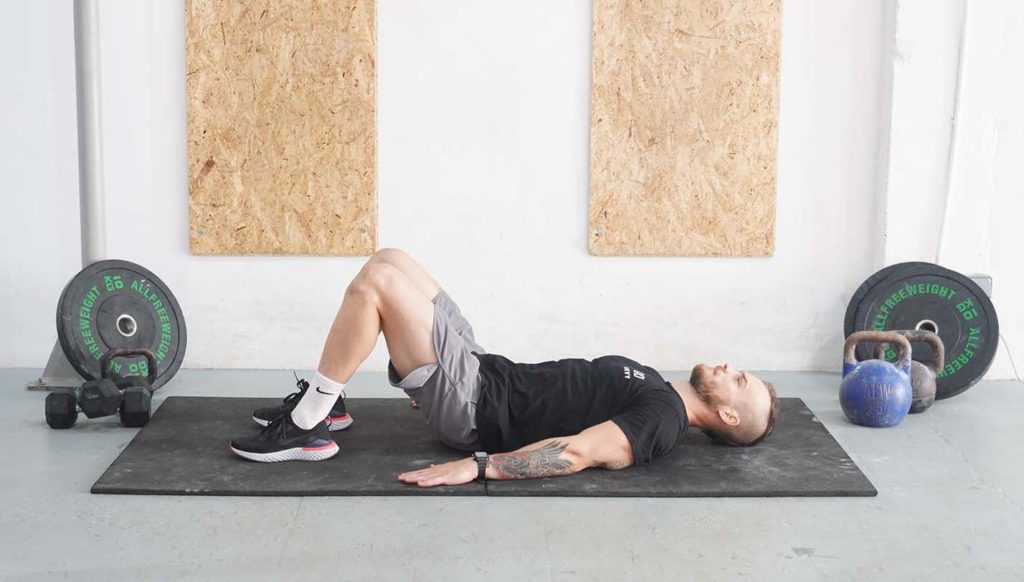
As you initiate a repetition, do so by first engaging your glutes before thinking about driving through your heels. The simple cue can improve glute activation and make the exercise more effective.
The fourth tip is to perform repetitions slowly and with good body control. Too many trainees rush through glute bridges to complete more repetitions but doing so prevents them from engaging the correct muscles or creating enough tension for growth.
Variations and Modifications of the Glute Bridge
1. Banded Glute Bridge
Banded glute bridges are a variation where you loop a resistance band over your thighs, just above the knees. Doing so forces you to keep your knees out against the band, improving glute activation.
2. Single-Leg Glute Bridge
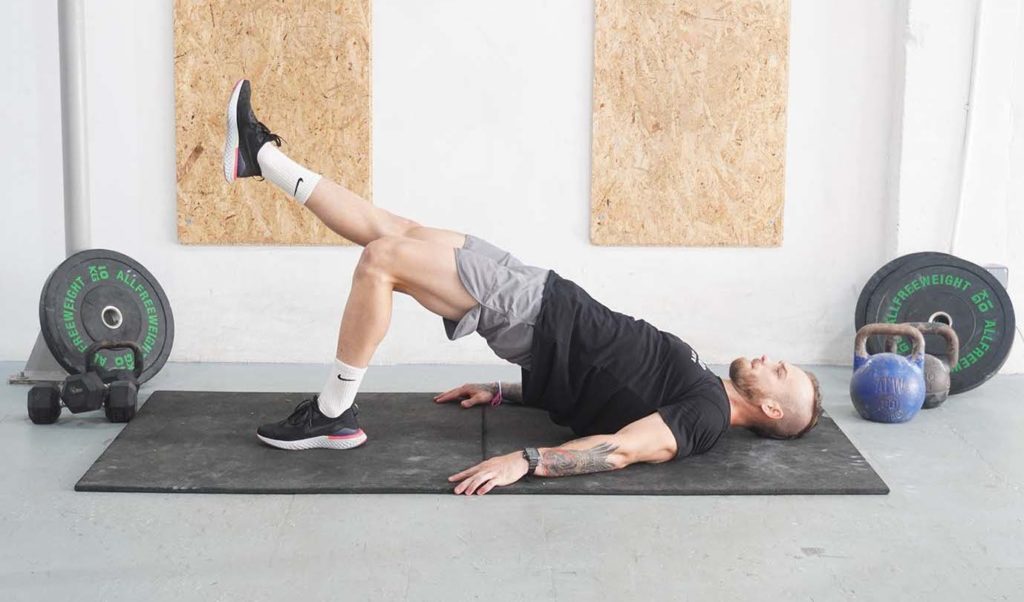
Single-leg glute bridges are an effective variation that works great for more advanced trainees who find the classic exercise too easy. The objective is to anchor one foot on the floor and extend the other leg. Once in position, drive your hips to the ceiling by supporting yourself on one foot.
3. Glute Bridge Hold
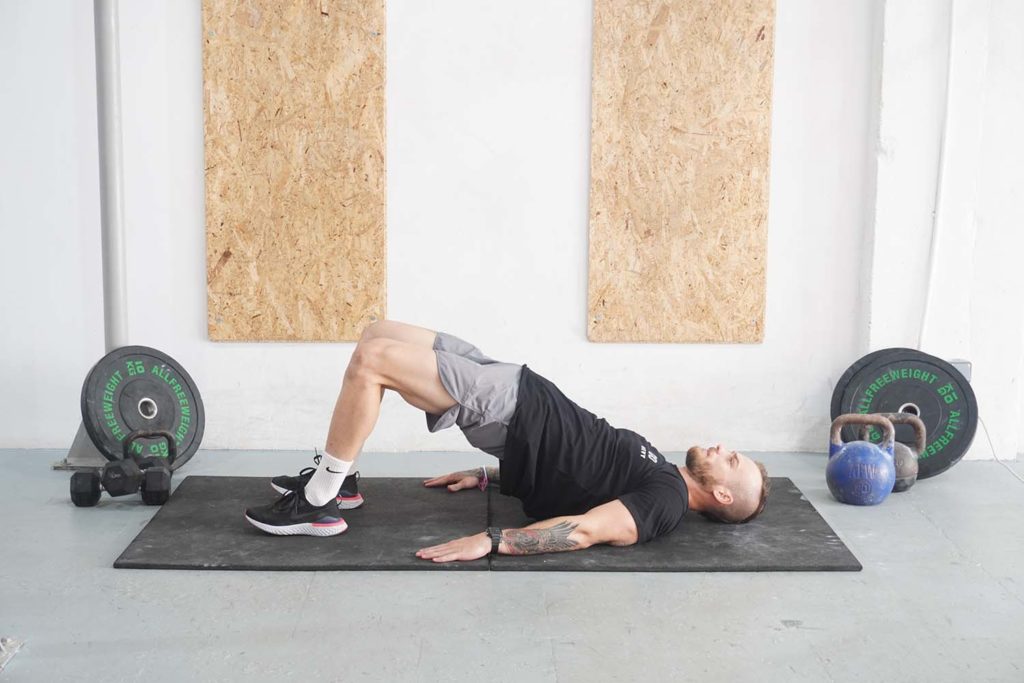
Glute bridge holds are an effective static variation that builds strength and stability. Like planks, reverse planks, and other such movements, glute bridge holds develop isometric strength and improve the mind-muscle connection with your posterior chain. The objective is to extend your hips and maintain the top position for 30 to 60 seconds.
Mistakes to Avoid
One of the most common mistakes with glute bridges is overextending your hips. As mentioned above, doing so forces you to hyperextend your back, placing unnecessary stress on your spine. Instead, you should extend your hips until they align with your shoulders and knees.
Another mistake with glute bridges is improper foot placement, and trainees often place their feet too close to their buttocks. Having your feet too close makes the execution uncomfortable and stresses your lower back. You should keep your feet at a position that leads to almost vertical shins and heels slightly in front of your knees as you extend your hips.
The third mistake to avoid is not pushing through your heels. Trainees would often press from their toes, shifting the emphasis to the quadriceps and calves. Avoid the error by anchoring your heels on the floor and pushing through them once you’ve engaged your glutes.
Similar Exercises to the Glute Bridge
Hip Thrust
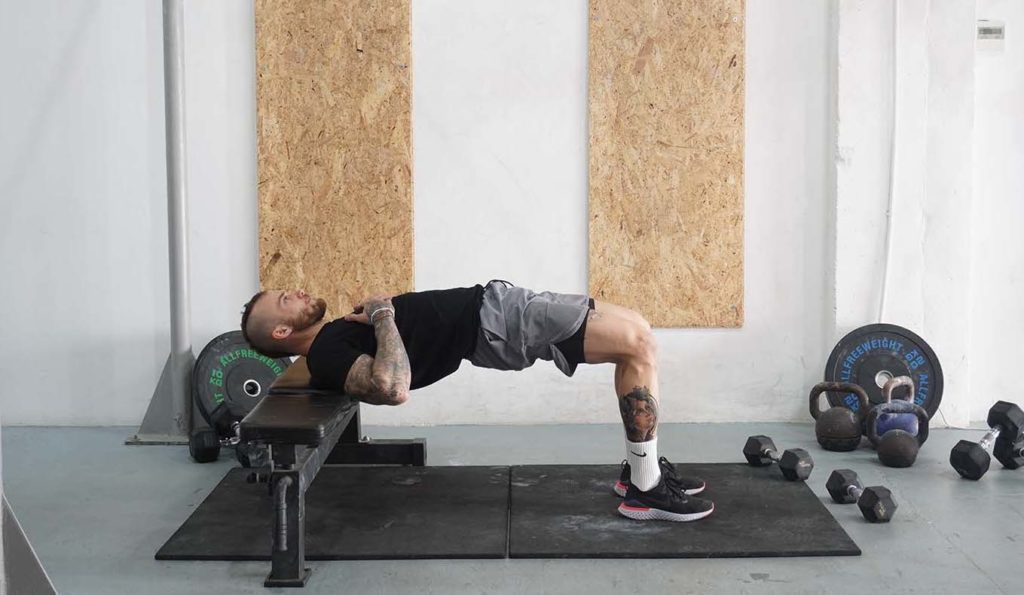
Hip thrusts are among the best compound exercises for the glutes and lower back (5). The movement pattern is similar to that of glute bridges with one difference. You have to support your upper back on a gym bench and place the weight (barbell) over the crease of your hips during a hip thrust.
Fire Hydrants
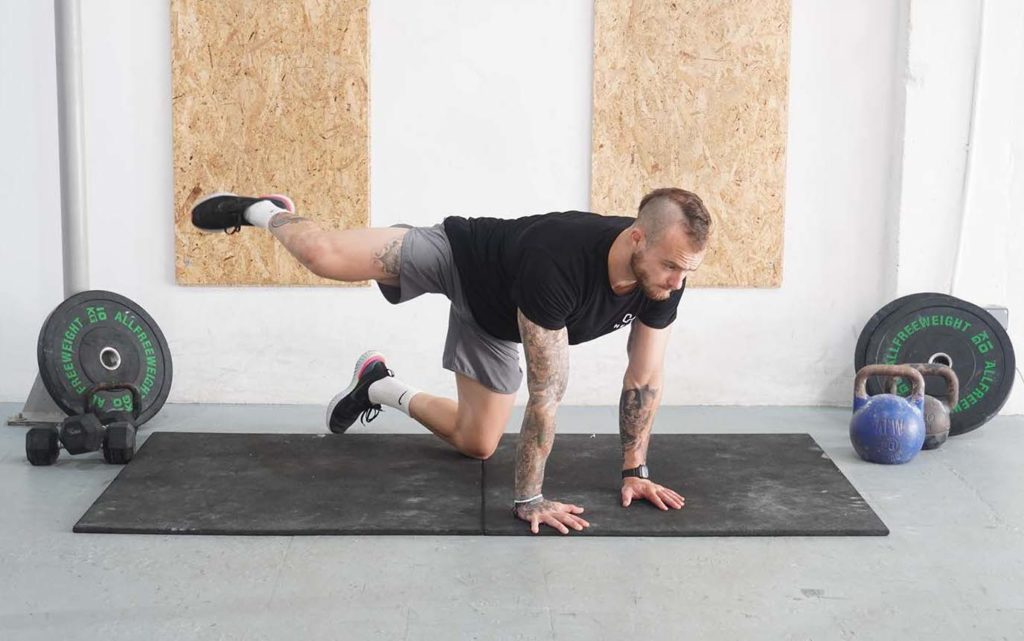
Fire hydrants are a simple exercise that strengthens your gluteus maximus, medius, minimus, and tensor fascia latae. Similar to glute bridges, fire hydrants require no equipment, and you can do them at home.
