The glute bridge and hip thrust are two popular exercises. Most people are familiar with the primary difference between these two activities:
You must place your upper back against the edge of a flat gym bench for hip thrusts, whereas the glute bridge requires you to lie flat on the floor.
Interestingly, there is a third similar exercise that’s become popular in recent times: the Kas glute bridge. The movement is named after coach Kassem Hanson, who popularized it in the last few years.
Despite its name, the Kas bridge is more similar to the hip thrust than the glute bridge because you must place your upper back against a bench or similar sturdy object. But, unlike the hip thrust, the range of motion is shorter, and you get to place even more emphasis on the glutes.
Read on to learn about the Kas glute bridge, how to perform it, its benefits, and more.
Hevy – Workout Tracker


Hevy – Workout Tracker
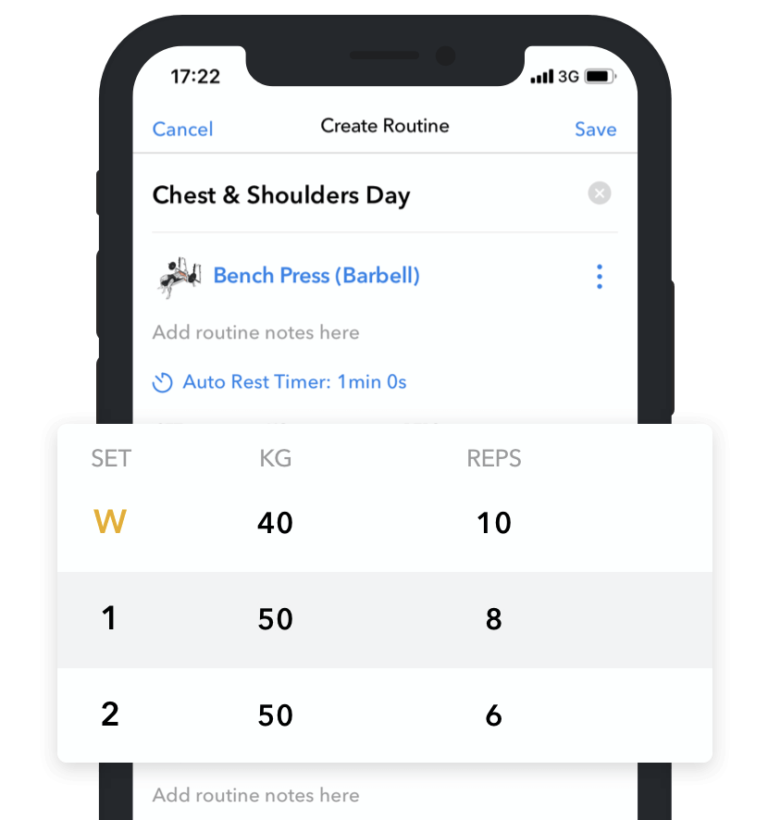
Log your Kas Glute Bridge exercises with Hevy, and track your progress
Log your Kas glute bridge exercises into the Hevy App and monitor your progress.
Step-By-Step Instructions for the Kas Glute Bridge
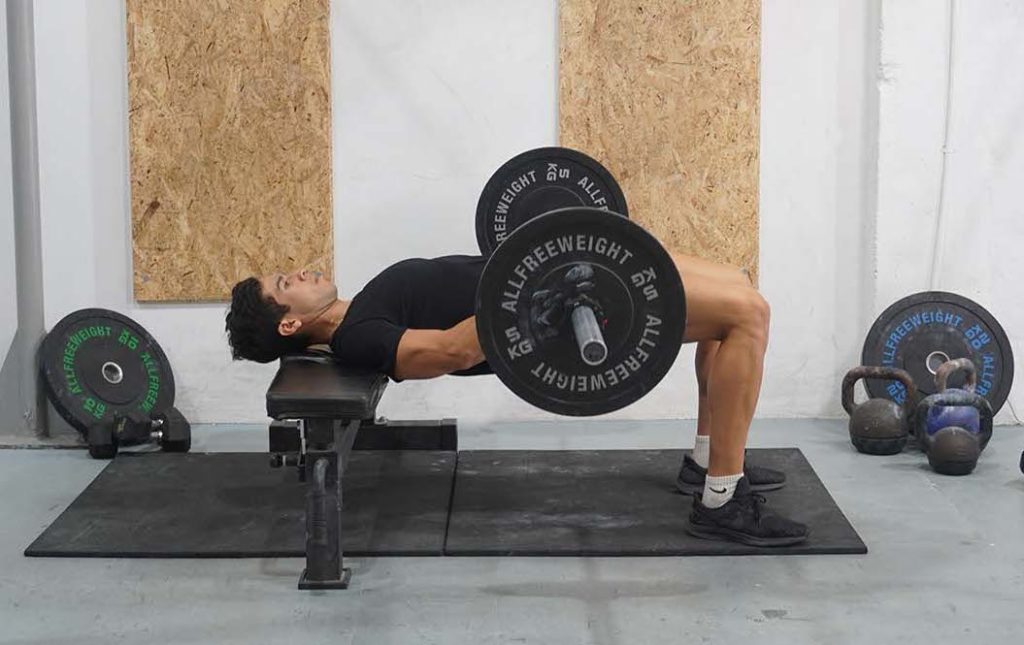

- Face away from a flat gym bench or plyo box and sit on the floor close to it.
- Lean your torso back and place your mid-back against the edge of the sturdy object.
Bend your knees and plant your feet flat on the floor.
Optional: Have a loaded barbell over the crease of your hips or place a dumbbell over your groin area and support it with both hands.
- Retract your shoulder blades, engage your abs, and inhale.
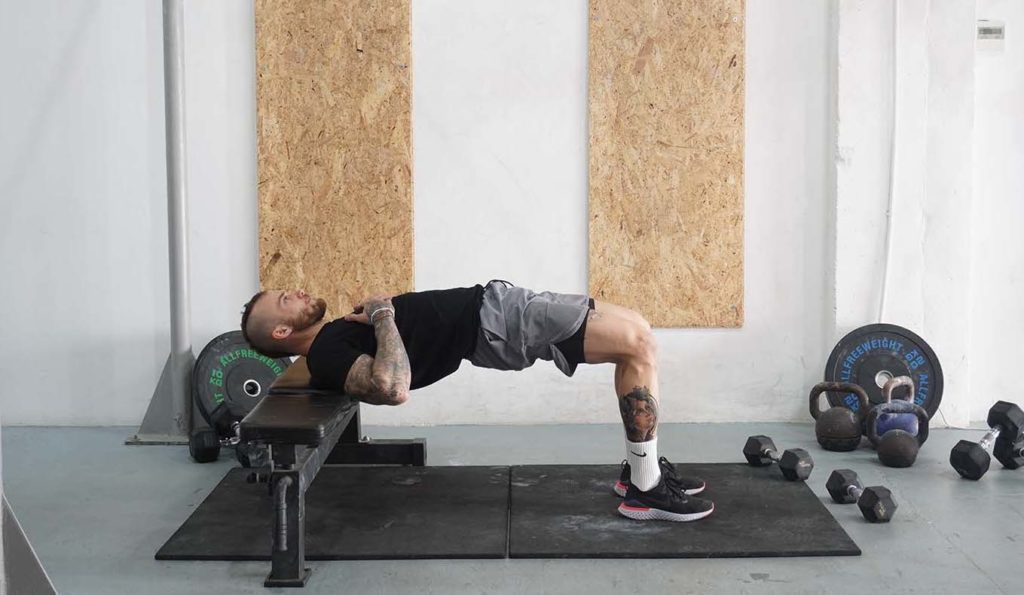
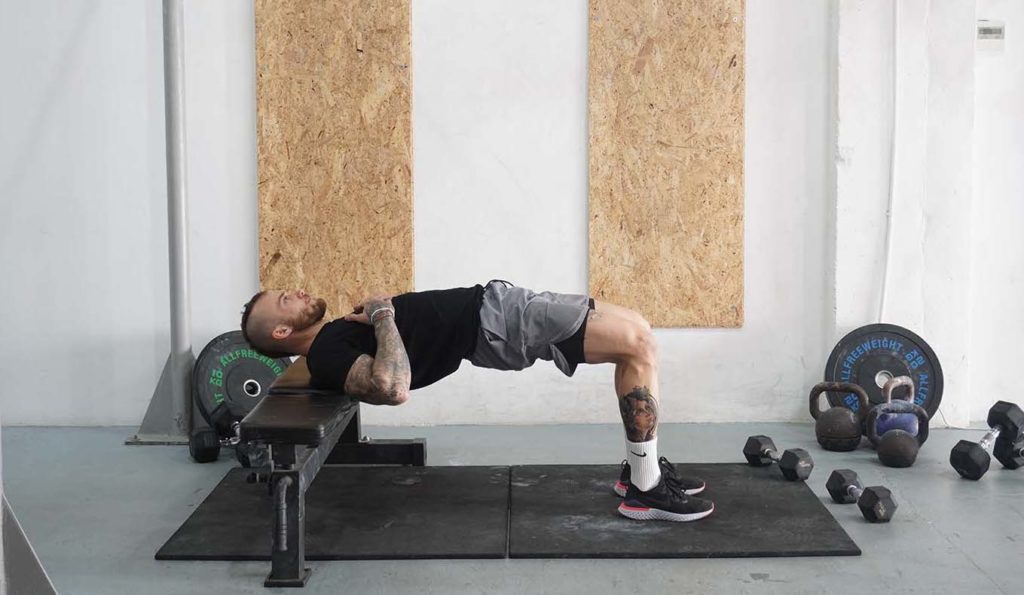
- Press through your heels to drive your hips toward the ceiling and move up until your knees, hips, and shoulders form a straight horizontal line. Your knees should be at a 90-degree angle and directly over your ankles.
- Hold the top position for a moment and slowly bend your hips, lowering your buttocks two to three inches. Keep your glutes and midsection engaged.
- Squeeze your glutes and press through your heels again to extend your hips to the top position.
- Keep bending and extending your hips a couple of inches at a time, breathing regularly as you do.
- Once finished, lower your buttocks to the floor and take a break.
Benefits of the Kas Glute Bridge
1. Reduces the Risk of Momentum
Hip thrusts and glute bridges are excellent, but they feature a longer range of motion, which increases the risk of using momentum. As a result, trainees often ‘bounce’ off the bottom position, extending their hips toward the ceiling to lift more weight or do more reps.
Aside from placing stress on the lower back and tailbone, bouncing off the floor takes the tension away from the posterior chain, making the exercise less effective.
Kas glute bridges reduce the risk because of the shorter range of motion. Instead of dropping your buttocks to the floor, you must fully extend your hips and lower them just a couple of inches before initiating the next repetition.
2. Constant Tension
Thanks to the shorter range of motion, Kas glute bridges keep constant tension on your posterior chain, leading to much greater muscle activation.
As a result, the exercise could lead to more strength and hypertrophy, though we don’t have any data to support such claims.
3. Proper Glute Isolation
The Kas glute bridge is a posterior chain exercise, but it mainly works the gluteal muscle group, which works hard to promote hip stability and produce extension (1).
People with strong glutes will mostly feel the buttocks region during the exercise. You might have weak glutes if you feel more activation in your hamstrings than in the buttocks.
We will go over practical ways to fix such issues below.
4. Excellent Overloading Potential
Another huge advantage of the Kas glute bridge is the excellent overloading potential.
People new to the exercise should begin with the bodyweight version to master proper form, but they can later introduce external resistance.
Place a loaded barbell over the crease of your hips, like a hip thrust, or hold a dumbbell or kettlebell over your groin area.
Tips on Proper Form
Tense Your Midsection
The first tip for effective Kas glute bridges is relatively straightforward: keep your midsection tense from start to finish.
As discussed earlier, the movement offers a limited range of motion, which means proper muscle activation requires an excellent mind-muscle connection and whole-body stability.
To perform the exercise correctly, take a deep breath and engage your abs, putting your spine in a neutral position before lifting your buttocks off the floor.
A lower back arch during a Kas glute bridge means your rectus abdominis isn’t as engaged and is less able to provide torso stability.
Start without any Weight
Most people are eager to use as much weight as possible, even with new exercises.
The problem is that loading specific exercises before you’ve developed the necessary skill can impair movement patterns.
Instead of learning to perform activities through a full range of motion and engage the correct muscles, you develop compensatory patterns to lift as much weight as possible.
We recommend performing Kas glute bridges without weight for at least a couple of weeks to avoid such potential issues. Doing so will help you learn how to do the activity correctly and engage the correct muscles.
Do Each Repetition Slowly
Kas glute bridges have a limited range of motion, which can make the exercise challenging to perform. In some cases, trainees fall for the trap of doing repetitions too quickly and relying on momentum.
Instead of keeping constant tension on the posterior chain, quick repetitions switch the emphasis to the quadriceps, which assist by producing knee extension (straightening of the legs).
To make the most of the Kas glute bridge, do reps slowly. Initiate the first rep by gradually raising your buttocks off the floor, pause at the top for at least a second, and slowly lower your hips by a couple of inches. Pause once again and squeeze your glutes to complete the second repetition.
Each repetition becomes more challenging, and you feel your buttocks activating more when you slow down.
Align Your Body
The final tip for proper Kas glute bridges is correctly aligning your body. Doing so will keep you in the strongest possible position and allow you to train your posterior chain musculature.
First, you must plant your feet in the correct position for your knees to be directly over your ankles at the top position.
Having your feet too close would make the exercise more knee and quadricep-dominant. In contrast, having your feet too far can put unnecessary strain on your lower back, leading to pain. The ideal stance is where your feet are a few inches apart and your knees are directly over your ankles at the top of each rep.
Second, you must keep your knees aligned with your hips and shoulders at the top position. Squeeze your buttocks at the top of each repetition but keep tension on your abs to prevent your lower back from arching.
Common Mistakes to Avoid
1. Excessive Range of Motion
The first common error with the Kas glute bridge is lowering your buttocks too much on every repetition. Prevailing wisdom suggests that a longer range of motion is better, but that isn’t always the case.
Kas glute bridges are a movement with a partial range of motion. Their effectiveness depends on raising and lowering your buttocks a couple of inches through slow and controlled reps.
2. Inactive Midsection
The second common error with the glute bridge variation is not engaging your abs and allowing your lower back to arch. An anterior pelvic tilt, where the pelvis is rotated forward and the lower back is arched, can stop you from activating your glutes effectively.
Avoid the error by squeezing your abs before the first repetition and maintaining the tension until you’re done. Doing so brings the ribcage closer to the hip bone, leading to a neutral spine position (2). As a result, you can feel your glutes activate, even if you do quicker reps.
3. Improper Setup
The third mistake with Kas glute bridges is not setting your feet in the correct position, which can impair glute activation, defeating the movement’s purpose. Trainees typically have their feet too close, shifting the focus to the knees and quadriceps. In some cases, the feet are too far, making it more challenging to maintain balance and increasing the risk of lower back strain.
As discussed earlier, the optimal foot position is where your knees are directly over your ankles at the top of each repetition. Such a stance reduces the involvement of your quadriceps, allowing your posterior chain to do most of the work.
4. Too Much Weight
The final common error to be mindful of is using too much weight and developing compensatory patterns to perform the exercise. Trainees often use too much weight, which forces them to thrust their hips toward the ceiling before dropping their buttocks for the next repetition.
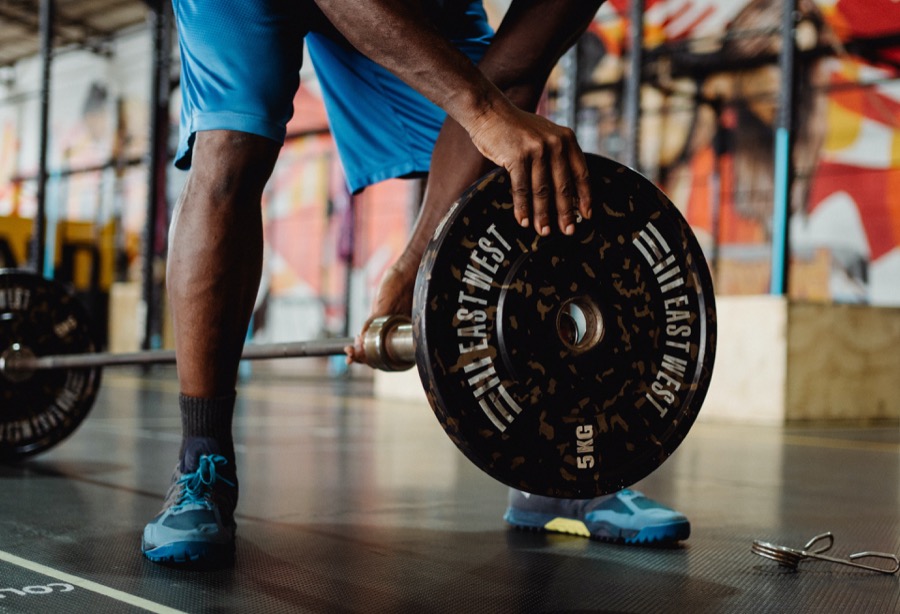

In addition to placing stress on the spine, thrusting prevents you from keeping the focus on the glutes. As a result, you might use more weight but will likely struggle to engage your glutes.
Despite sharing similarities to the hip thrust, Kas glute bridges are more of an accessory activity, so it is better to use lighter weights and do more reps (12+).
4 Variations of The Kas Glute Bridge
1. Barbell Kas Glute Bridge
The barbell Kas glute bridge is a variation where you place a loaded bar over the crease of your hips.
Using a barbell makes it easier to overload your body with more weight. Trainees can eventually work up to 200, 300, or even 400+ lbs, like with a hip thrust.
Still, maintaining proper form should be your number one priority. Start with the bodyweight version and gradually increase the resistance as you build strength and movement proficiency.
Related article: 2 Upper Glute Workouts and 10 Upper Glute Exercises
2. Dumbbell/Kettlebell/Weight Plate Kas Glute Bridge
Another common way to perform the Kas glute bridge is by placing a dumbbell, kettlebell, or weight plate over your hips and supporting it with both hands.
These weights provide just enough resistance to challenge you when you’re first learning to perform the exercise. For example, once you get used to the bodyweight version, you can start experimenting with a 10-lb weight plate or dumbbell.
3. Single-Leg Kas Glute Bridge
Single-leg Kas glute bridges are a less common variation of the exercise but one that offers some unique benefits.
To perform the exercise, set yourself up as you usually would but raise one foot off the floor and support yourself on the other. Doing so allows you to train one side at a time, leading to more balanced development and a lower risk of side-to-side muscle imbalances.
In many cases, the stronger side takes over during an exercise, causing the weaker one to remain small and undeveloped. Activities like Kas bridges give equal opportunity to both sides of your body to work, leading to a more balanced training stimulus.
Training one side at a time also shows you if there are existing imbalances. For example, if you can do 15 smooth and controlled reps on your right side but struggle with balance and can barely get 10 to 12 on your left, it likely means an imbalance.
In addition, training one side at a time is a helpful way to make the exercise more challenging if you don’t have the necessary weights.
4. Floor Kas Glute Bridge
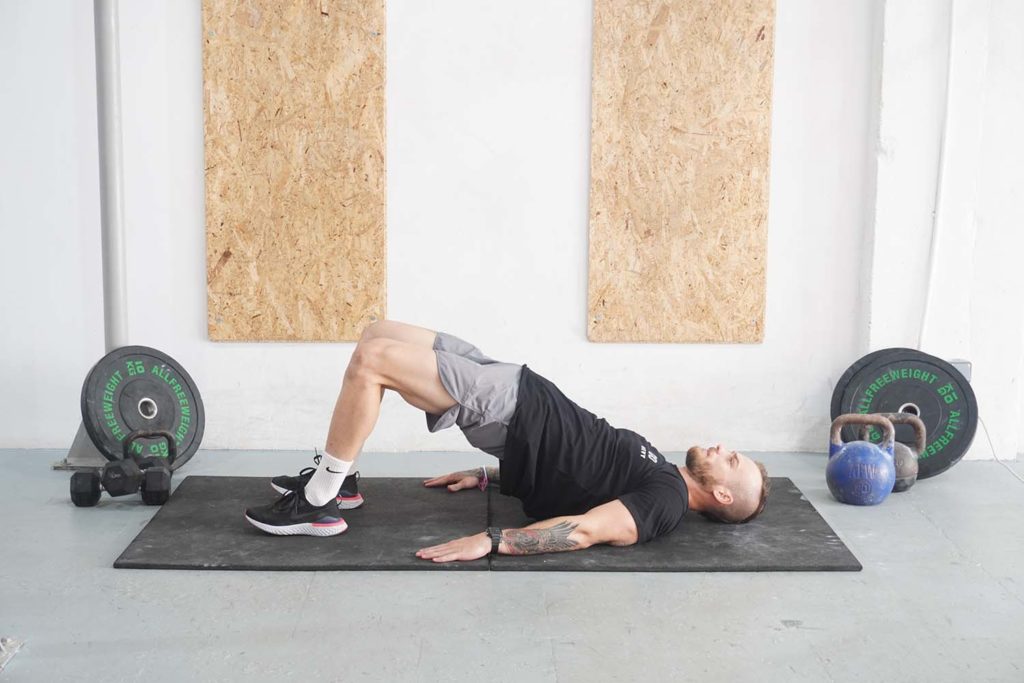

The final notable variation of the exercise is the floor version. As its name suggests, the objective is to set yourself up on the floor, similar to how you would for a regular glute bridge.
Performing the exercise on the floor allows you to train your glutes even if you don’t have access to equipment such as a gym bench and weights.
To make the movement more challenging, you can train one side at a time by keeping one foot in the air.


Hevy – Workout Tracker


Hevy – Workout Tracker
Log your Kas Glute Bridge exercises with Hevy, and track your progress
Try logging and tracking your Kas glute bridge using the Hevy app and track your progress.
Frequently Asked Questions (FAQs)
Kas glute bridge vs. hip thrust: which is better?
Both exercises offer unique benefits, and nothing stops you from doing them in the same training plan.
As discussed, Kas glute bridges are an excellent exercise that promotes good form, keeps constant tension on the glutes, and has a decent overloading potential.
The hip thrust is great for overloading your entire posterior chain with more weight and through a more extended range of motion. Like the Kas bridge, the hip thrust is straightforward, and most people learn how to perform it relatively quickly.
What is the most effective glute bridge?
There isn’t a single best glute bridge, as each variation offers unique benefits and comes with some drawbacks.
For example, the classic glute bridge is one of the best exercises beginners can start doing to train their posterior chain and learn how to activate their glutes. As trainees get stronger, they can transition into a single-leg glute bridge or use external weight to provide the necessary overload.
A Kas glute bridge isn’t necessarily superior to other variations. However, it serves a purpose, and you can do it alongside other effective glute exercises: hip thrusts, classic glute bridges, glute kicks, fire hydrants, etc.
Related article: Best Leg Workout and Exercises for a Strong Lower Body
Why do I feel the Kas glute bridge in my quads?
There are three primary reasons for feeling the Kas glute bridge in your quads instead of the glutes.
- Improper setup, where your feet are too close, causing your knees to flex more than they should, shifting the emphasis to the quadriceps
- Inability to activate your glutes, forcing the quadriceps and other muscles to take over
- Doing reps too quickly robs your glutes of tension and instead leads to an over-reliance on the momentum
Final Thoughts
The Kas glute bridge is not a special exercise that will lead to incredible training results but offers some unique benefits.
Most notably, the exercise improves glute activation, keeps constant tension on the posterior chain, and isolates the glutes.
In addition, you can pick from several effective variations, including the bodyweight version and single-leg Kas bridges.
The exercise is relatively straightforward, but be mindful of the most common mistakes, including using too much weight and not setting yourself up correctly.
Don’t forget to check out the Hevy app if you’re looking for a simple tool to find effective exercises, log your workouts, and much more.


